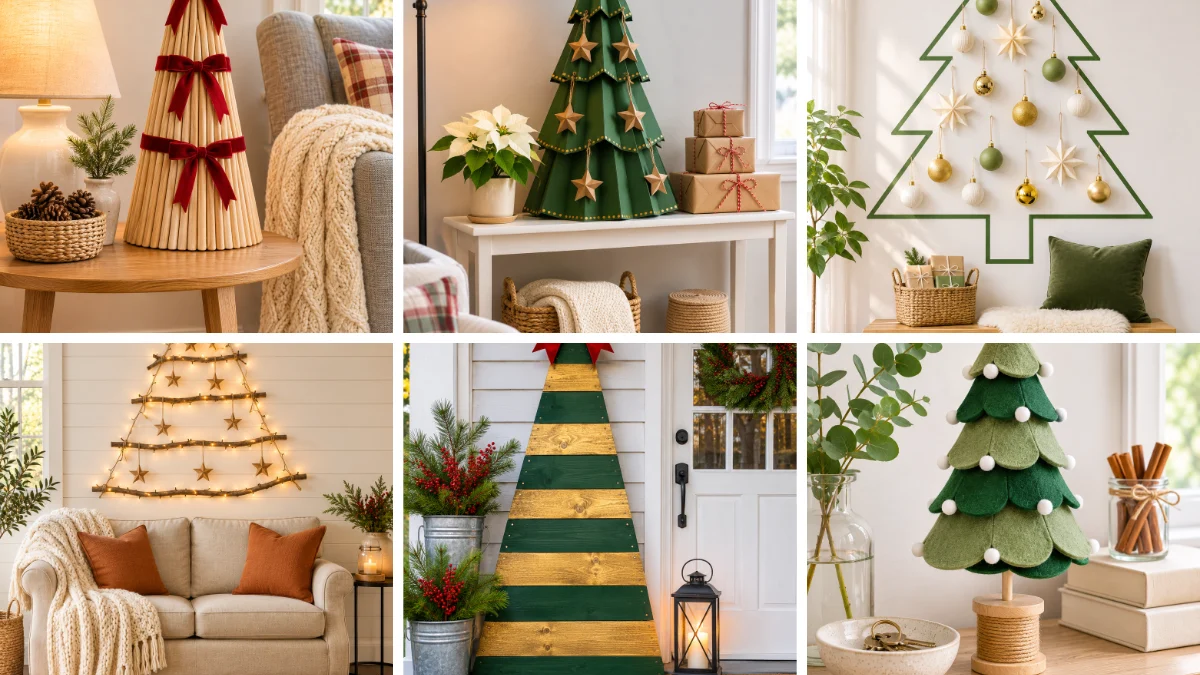
Your living room has no floor space left for a full-size tree, or your budget has no room for one. Sound familiar?
These 15 ideas prove a diy christmas tree can fit a corner table, a bare wall, a porch or a kitchen island. Each one comes from a different room and style, so you can borrow a shape, a palette or a whole look.
Grab a cup of something warm and start scrolling.
Table of Contents
1. Make a cozy Scandinavian corner with a wooden dowel cone tree
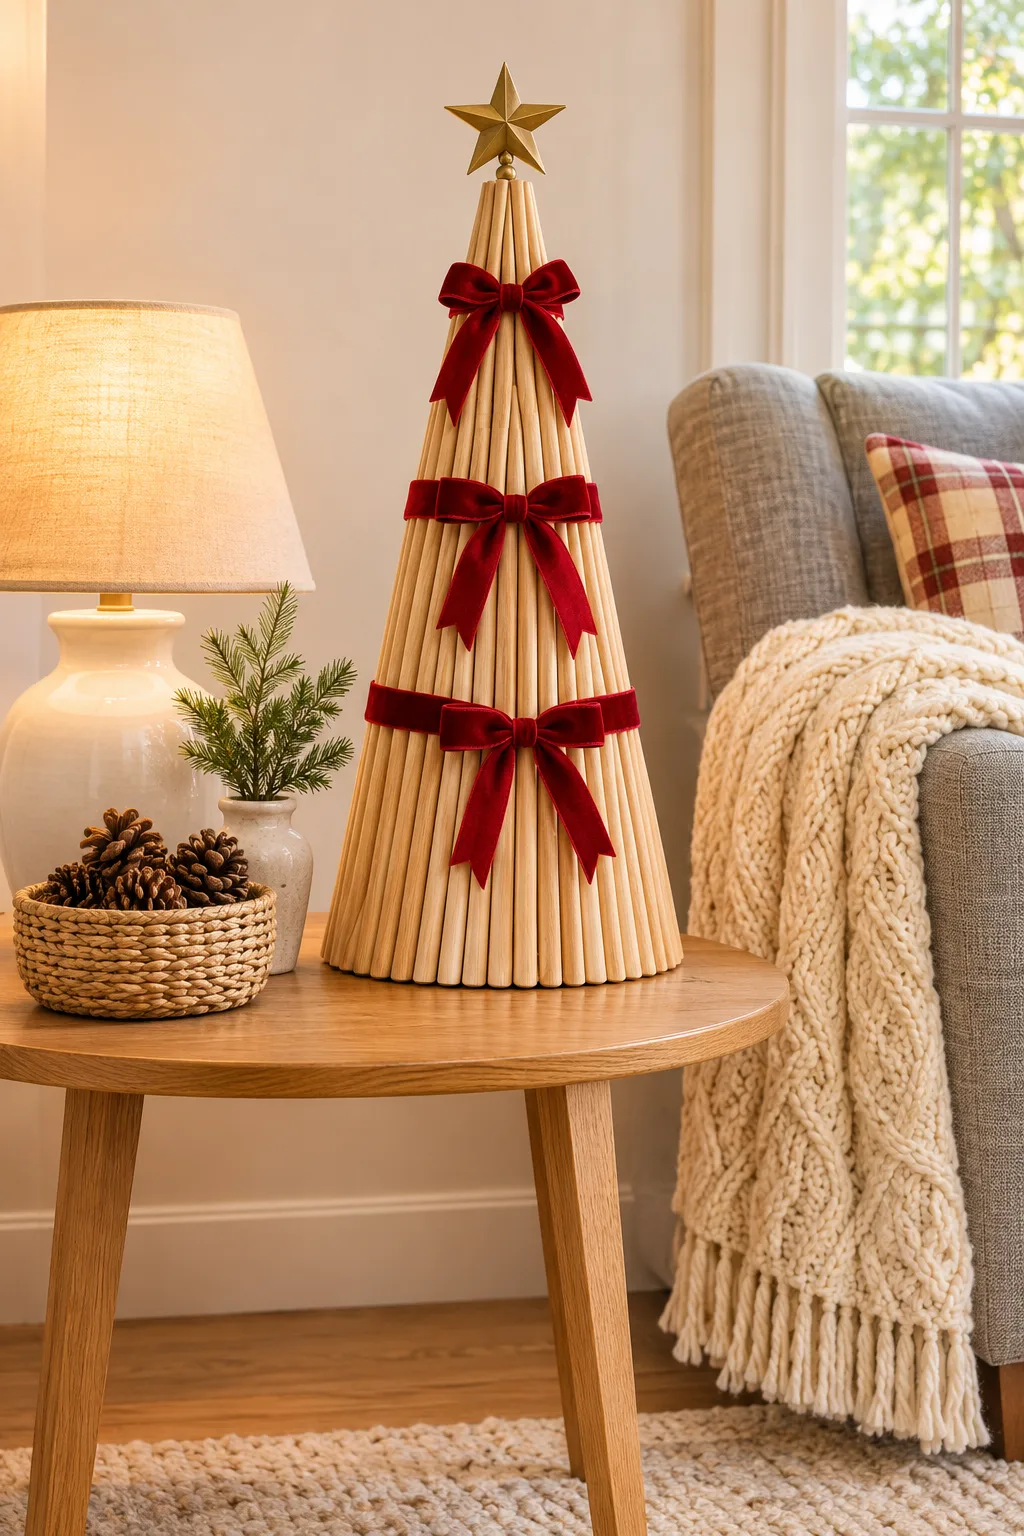
A tall cone of pale wood glows like a lamp in a corner, and you can build this diy christmas tree in an afternoon.
What you’ll need
- Thin wooden dowels in one length, plus a few shorter ones
- Velvet ribbon in deep burgundy
- A small gold star for the top
- A round side table, a basket of pine cones and a cream vase of evergreen sprigs for styling
How to make it
- Sort the dowels by length and sand any rough ends so the cone looks clean.
- Stand them upright and side by side in a ring, tallest in the middle, and tuck them tight so they taper to a point.
- Secure the ring however suits your base (glue, a hidden core or a drilled block all work).
- Tie 3 velvet bows down the cone, making each one larger as you go toward the bottom.
- Set the star on top and place the tree in the center of the table.
Pick dowels with a light honey tone, since the wood glows against a warm cream wall. Use a 1/2 inch gap between the bows and the star so the top stays airy. Then pile pine cones in a woven seagrass basket on the left and let a lamp behind the table do the rest.
💡 Pro Tip: Rub a little wax or clear oil over the dowels before you assemble. Light wood picks up the lamp glow better and resists fingerprints.

Woven Seagrass Storage Basket
2. Build a budget cardboard cone tree for a small apartment
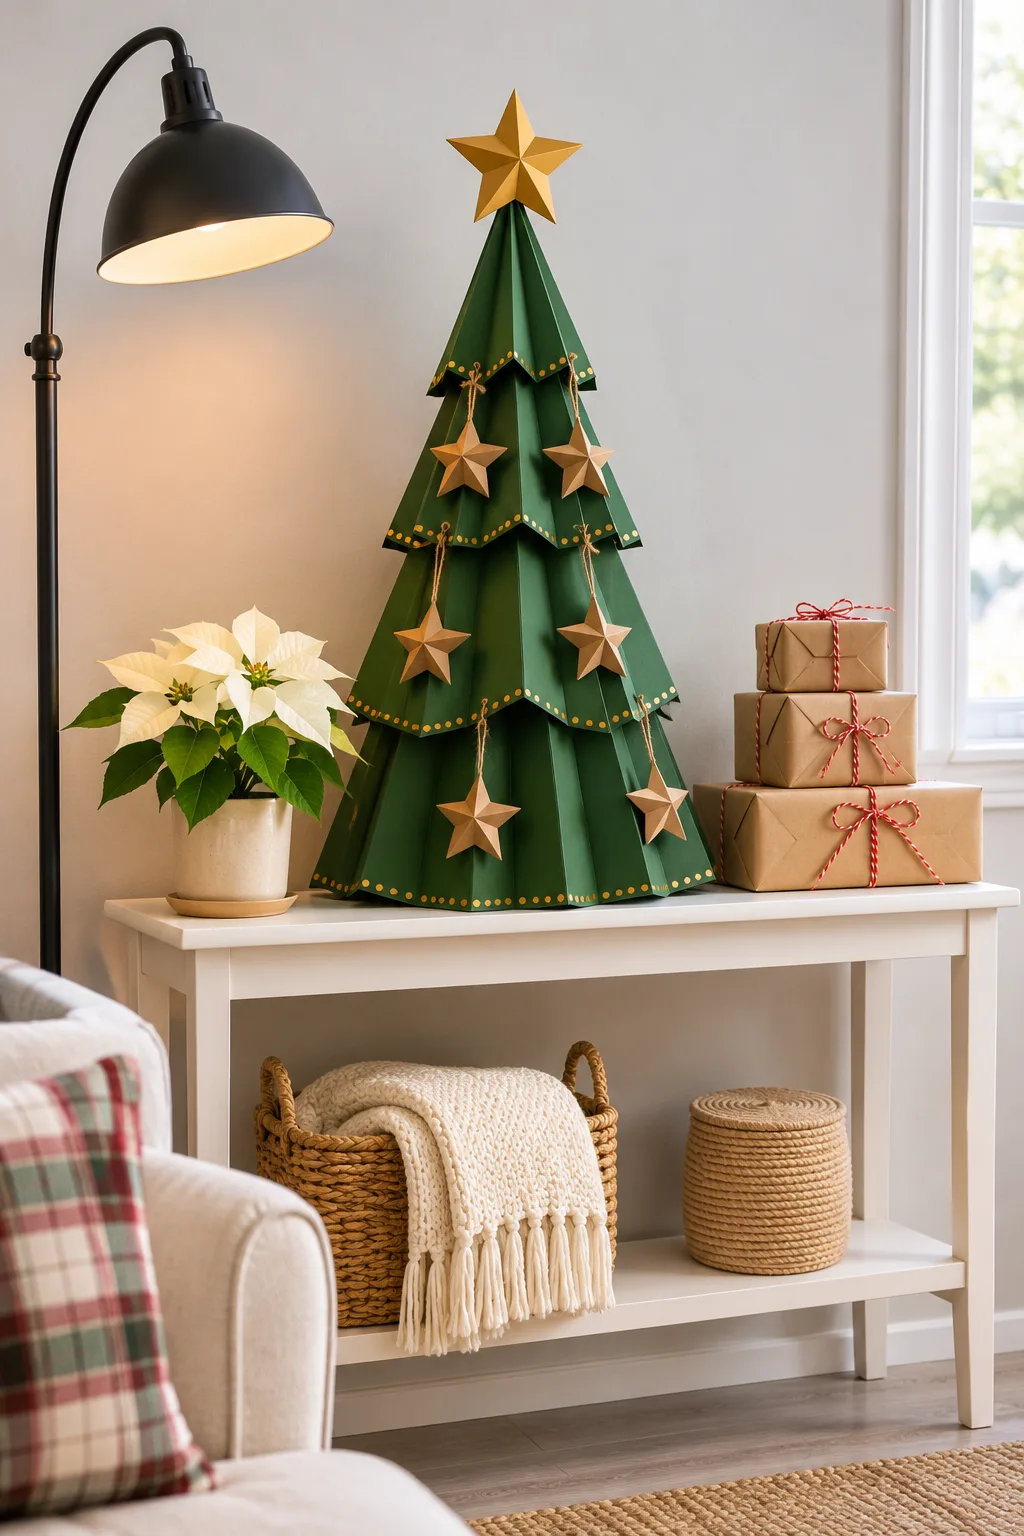
This pleated green tree looks like it cost far more than a few sheets of recycled cardboard and some paint.
What you’ll need
- Recycled cardboard or heavy cardstock
- Forest green paint and gold paint for dots
- Kraft paper and red and white baker’s twine
- A gold paper star
How to make it
- Cut 4 strips in graduated lengths and pleat each one like an accordion.
- Paint them green and let them dry fully.
- Dot the edges with gold paint.
- Stack the tiers from largest to smallest and support them from inside.
- Top with the star and hang small kraft stars on twine.
For cheap diy christmas tree ideas on a budget, this is the one to start with. Swap the painted star for gold-painted cardboard and you’ve replaced the priciest-looking piece for pennies.
Short on space? Make 3 tiers instead of 4 and the tree fits on a narrow console. A lower shelf below holds baskets for blankets and wrapping paper.
Real life check: cardboard dents, so keep it out of reach of dogs and toddlers. Wipe it with a dry cloth only.
3. Draw a renter-friendly wall tree with tape and hanging ornaments

A blank white wall becomes the tree, and you never touch a nail.
What you’ll need
- Green tape for the outline
- Gold, olive and cream ornaments on thin cords
- Cream paper stars and a large gold paper star
- A light wood bench, a jute rug and a basket of wrapped gifts
How to make it
- Mark the tree height with a light pencil line, then sketch a stepped outline with a notched trunk.
- Press the green tape along the lines and smooth each strip.
- Hang ornaments on removable hooks or adhesive strips, spaced evenly inside the outline.
- Add the large star at the peak.
These are diy christmas tree ideas for renters no damage required. Low-tack painter’s tape lifts clean, so test a hidden corner first.
Style the bench below with an olive velvet pillow and a fluffy cream throw. Keep gold and cream ball ornaments to 3 colors, and the whole thing reads as calm and graphic.

Gold And Cream Ball Ornaments
4. Hang a glowing branch tree with fairy lights above the sofa

Five bare branches and a strand of lights make a diy christmas tree that turns the wall over your sofa into the warmest spot in the house.
Style: Warm modern farmhouse | Palette: Amber, cream and rust | Key materials: Bare branches, twine and shiplap
The triangle of branches is the focal point, and the cream sofa sits centered right underneath so the two line up. Branches grow longer toward the bottom, and twine lines trace the tree’s sides.

Warm string lights wrap each branch, with small star ornaments dangling below. Rust pillows add punch against the cream, and a large jute rug grounds the wood floor.
How to recreate this look
- Choose dry, sturdy branches and strip loose bark, so nothing flakes onto the cream sofa.
- Keep the lowest branch about 12 inches narrower than the sofa so the tree feels sized to it.
- Wrap lights with a cord color that matches the branch, and check them weekly if pets chew cords.
Why this design works
A single strong focal point above the seating draws the eye up and makes the room feel taller and cozier.

Warm White LED String Lights
5. Paint a bold gold and green pallet tree for the front porch

A flat triangle of striped boards makes a loud, cheerful diy christmas tree to welcome guests beside the door.
What you’ll need
- Horizontal wood boards with visible grain
- Matte green paint and gold paint or stain
- A big red velvet-look bow
- Screws and a sturdy way to lean it against the siding
How to make it
- Cut boards in graduated lengths to form a triangle.
- Paint every other board gold, letting knots show through.
- Paint the rest deep green.
- Screw the boards to two back supports.
- Tie on the red bow and lean the tree beside the door.
Weatherproof paint matters outdoors. Use exterior paint, and stash the bow indoors during storms. Galvanized buckets of evergreen and red berries flank it nicely.
⚠️ Avoid This: Don’t skip a second support at the back. A tall flat tree catches wind like a sail and will tip.
6. Craft a tiny felt tree on a wooden spool for shelves and entry tables
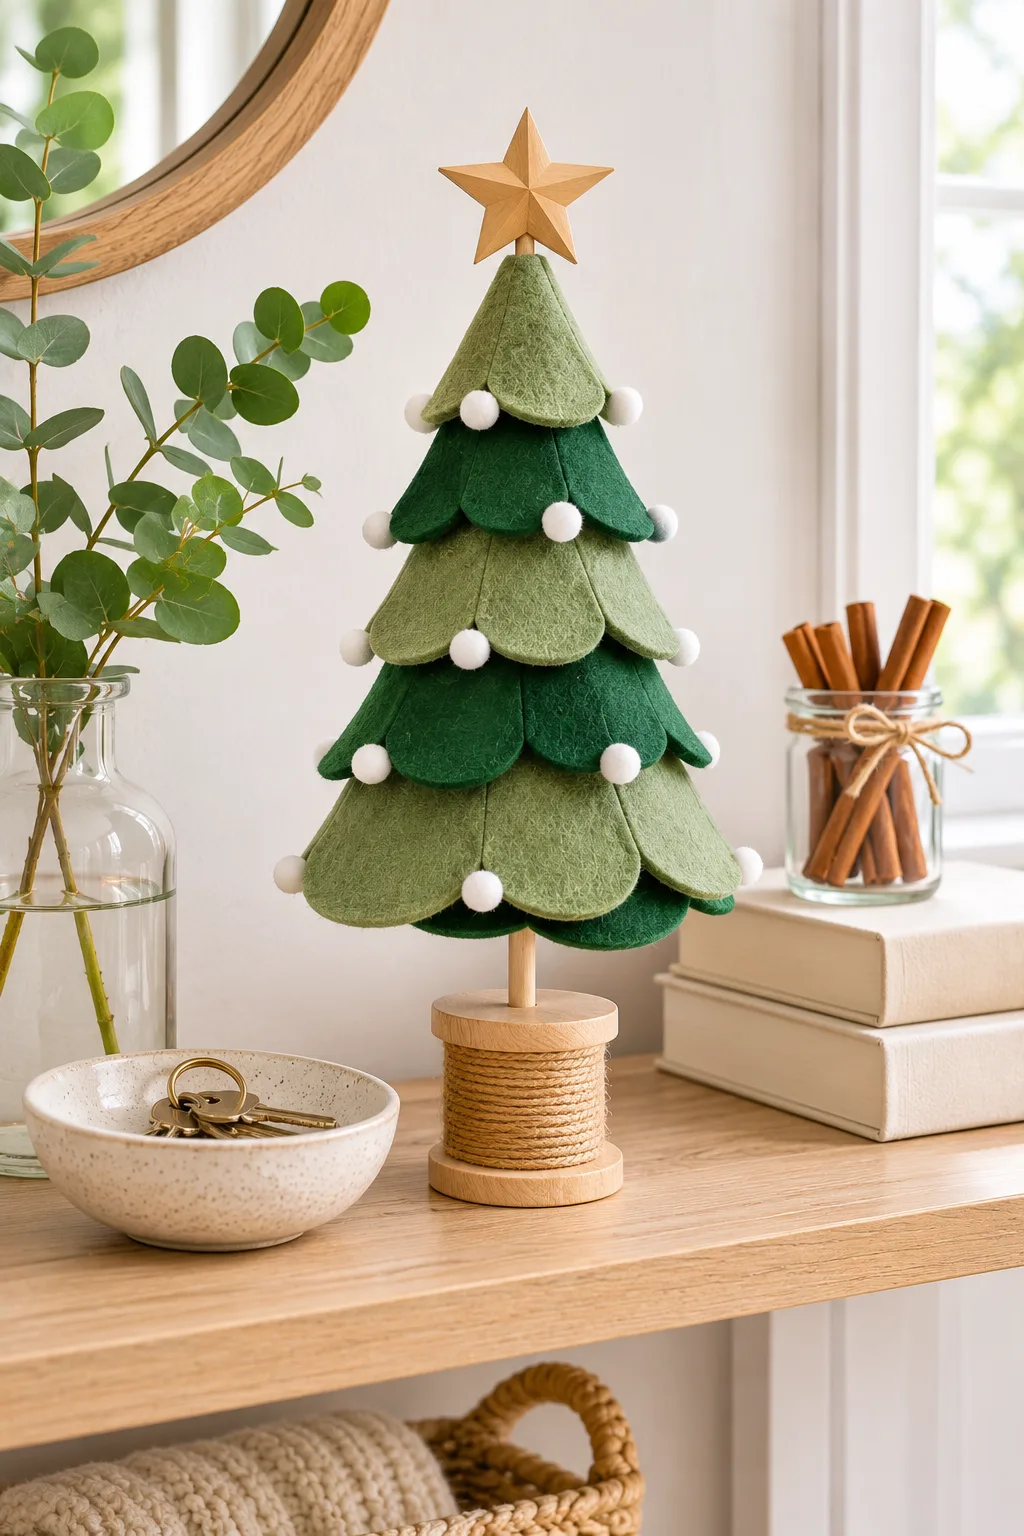
This mini tree fits where a full one never could, and it takes about an hour.
What you’ll need
- Felt in light sage and deep emerald
- White pom-poms
- A wooden spool wrapped in jute twine
- A small wood star and a skewer
How to make it
- Cut 5 felt circles in decreasing sizes and scallop the edges.
- Poke each one through the skewer, alternating sage and emerald.
- Glue a white pom-pom to each scallop.
- Push the skewer into the spool base.
- Glue on the star.
Keep the largest tier about 6 inches across and the tree stays shelf-sized. Craft felt works best when it’s stiff, and a lint roller handles dust. For easy diy christmas tree ideas for small spaces, this one wins.

Craft Felt Sheets Assorted Green
7. Light up a dining table with a forest of paper trees

Five folded white trees glowing at different heights make a diy christmas tree display that keeps a dining table calm and serene.
Style: Minimal Scandinavian | Palette: Warm white and light birch | Key materials: Folded paper, oak and linen
The tallest tree sits in the center of the runner and anchors the group. Four shorter ones step down on either side, and the pleats catch warm light from within.
Two white tapers in wooden candlesticks, a bowl of silver ornaments and evergreen sprigs in a cream vase finish the scene. Tall windows add soft winter daylight.
How to recreate this look
- Group trees in odd numbers and vary heights by 3 to 4 inches so they read as a forest.
- Use heavy white cardstock, which holds crisp pleats and glows more evenly than thin paper.
- Keep candle flames well clear of the paper, at least 8 inches, or use LED tapers.
Why this design works
Graduated heights and one pale color give the table rhythm without clutter, so the glow does all the talking.
8. Lean a bright green ladder tree in the kids’ playroom
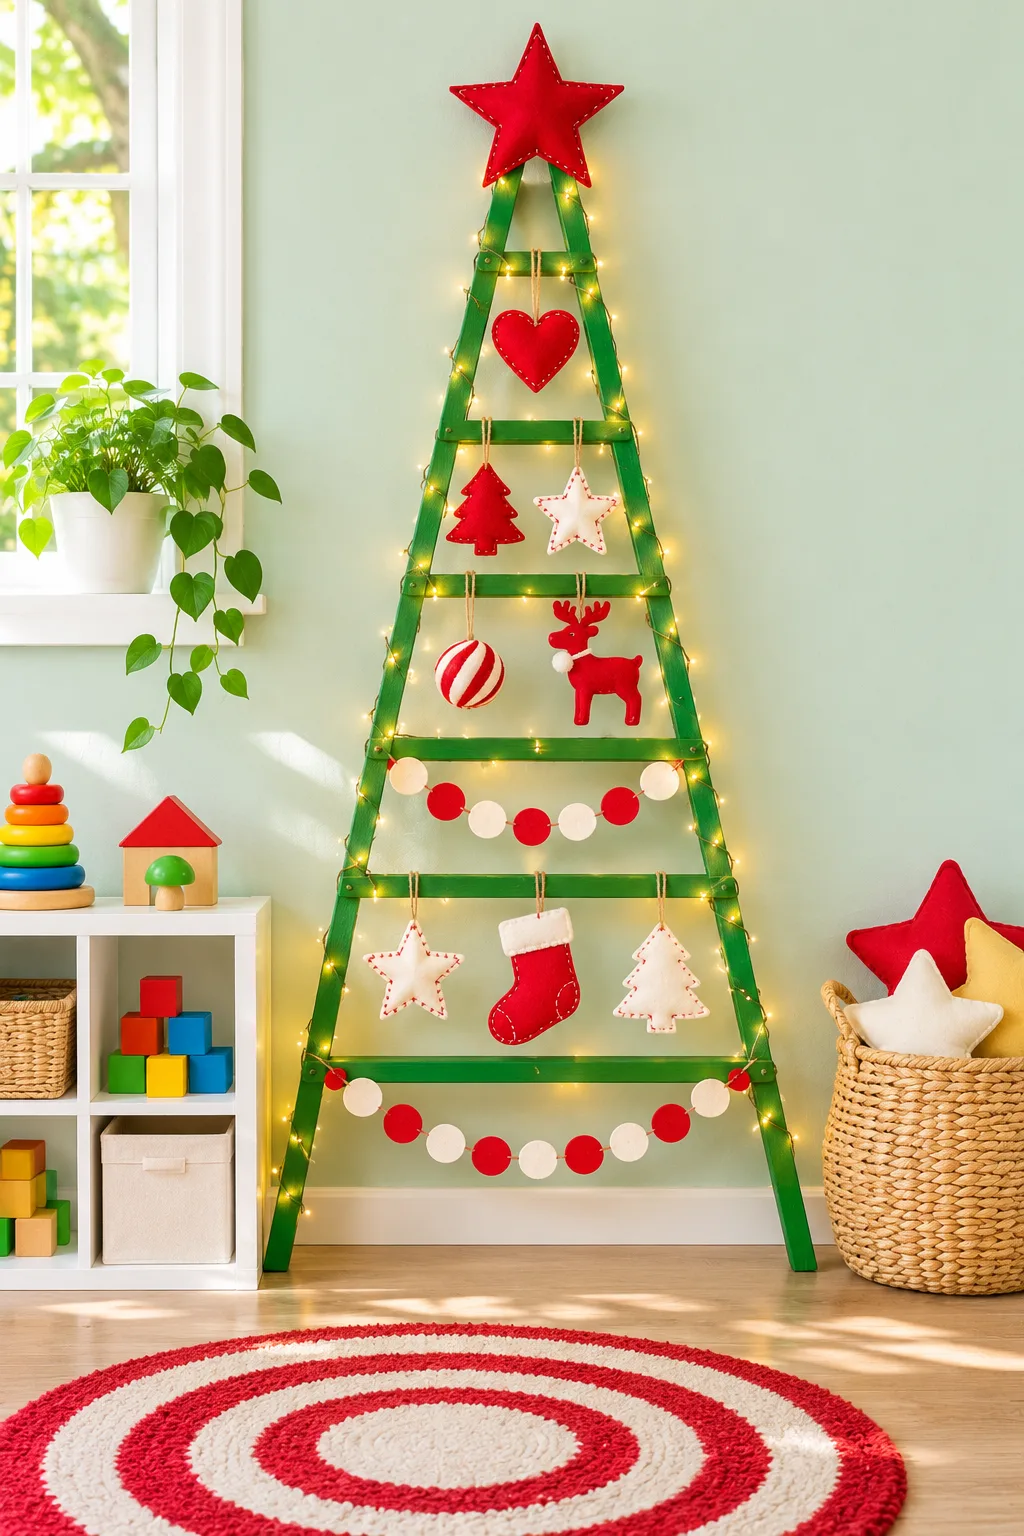
A tall green A-frame frees the floor and gives little hands something to decorate.
What you’ll need
- A painted wood A-frame in bright green
- Felt ornaments (heart, tree, star, ball, reindeer, stocking) on twine loops
- Red and cream felt circle garlands
- Fairy lights and a red felt star
How to make it
- Paint the frame and let it cure for a day.
- Hang felt ornaments from twine loops on the rungs.
- Drape the felt garlands across rungs.
- Wind the lights along both sides and top with the star.
Felt ornaments are soft and kid-safe, so toddlers can rearrange them. Fasten the frame to the wall with a safety strap if small climbers are around.
A 4 by 6 foot round rug in red and white defines the play zone. And a small ladder works for a tighter room.
9. Stack a glowing book tree in a moody reading nook

Books stacked from big to small, then wrapped in tiny lights, make a literary tree for a dark corner.
Style: Moody vintage library | Palette: Navy, green and antique gold | Key materials: Books, velvet and dark wood
The glowing stack sits on a round pedestal table, which is the focal point. A green velvet armchair on the left and a dark built-in shelf on the right frame it.
A brass arc lamp with a cream shade warms the navy wall. A pierced gold candle holder and a cinnamon bundle at the base add small details.
How to recreate this look
- Stack 6 to 8 books, with the widest at the bottom and each layer about an inch narrower.
- Buy thrift-store books by the pile for a budget version, and pick cloth covers in navy, green and brown.
- Choose battery lights if you rent, and wind them loosely so you can unwrap without tugging.
🤔 Did You Know? Dark walls make small lights look brighter, so a short strand of fairy lights goes a long way here.
Why this design works
A deep backdrop plus warm light creates contrast, and the eye lands on the tree first.
10. Style a glam copper wire tree trio on the mantel
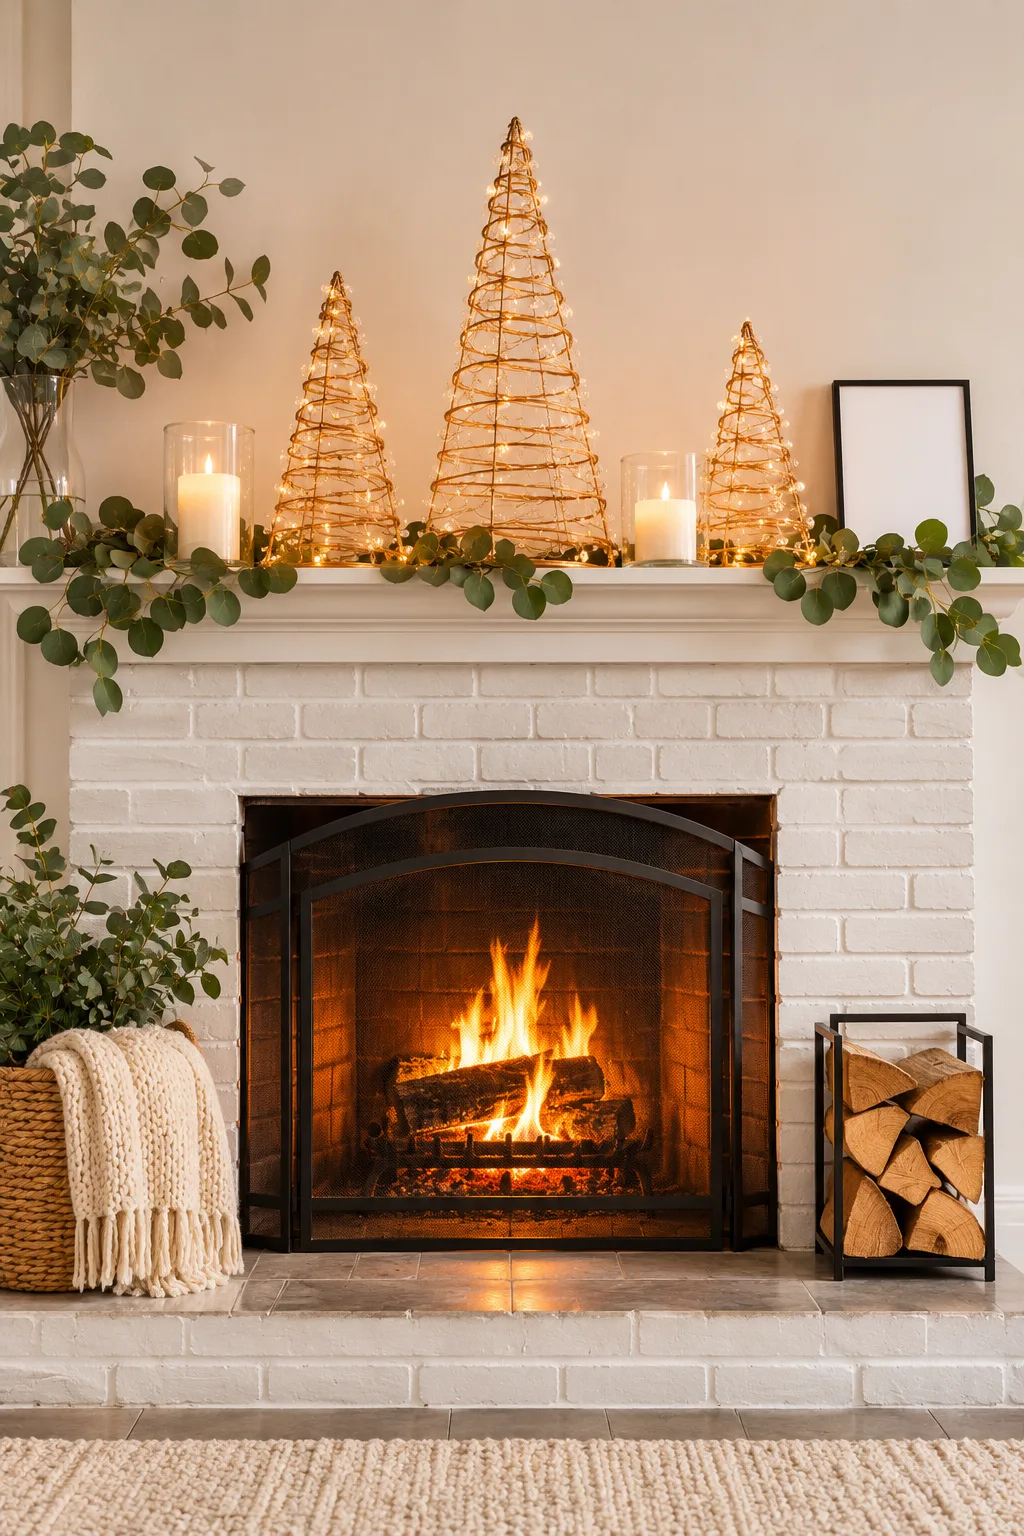
Three spiral wire trees with tiny lights turn a white brick fireplace into a glittering centerpiece.
Style: Warm glam minimalist | Palette: Copper, warm white and black | Key materials: Spiral wire, brick and eucalyptus

The trio sits centered over the fire in tall, medium and small sizes. A eucalyptus garland drapes along the mantel and pillar candles in glass hurricanes sit between.
A black arched screen anchors the base, with a log holder on the right and a wicker basket and cream throw on the left. A cream textured rug lies in front.
How to recreate this look
- Bend copper-toned craft wire around a cone form, and keep spirals about 1 inch apart so lights show through.
- Space the 3 trees about 6 inches apart on the mantel so the garland shows between them.
- Pick a rug that reaches at least 18 inches past the hearth, so the area feels grounded.
💡 Pro Tip: Keep wire trees and garland well away from any open flame, and use LED candles near greenery.
Why this design works
Graduated sizes create rhythm, and the metallic shine bounces firelight around the room.
For more inspiration, browse modern minimalist living room ideas and green sofa living room ideas to pair with these trees. The soft green velvet in the reading nook is a good place to start.
11. Wrap a rustic jute twine tree for a welcoming entryway
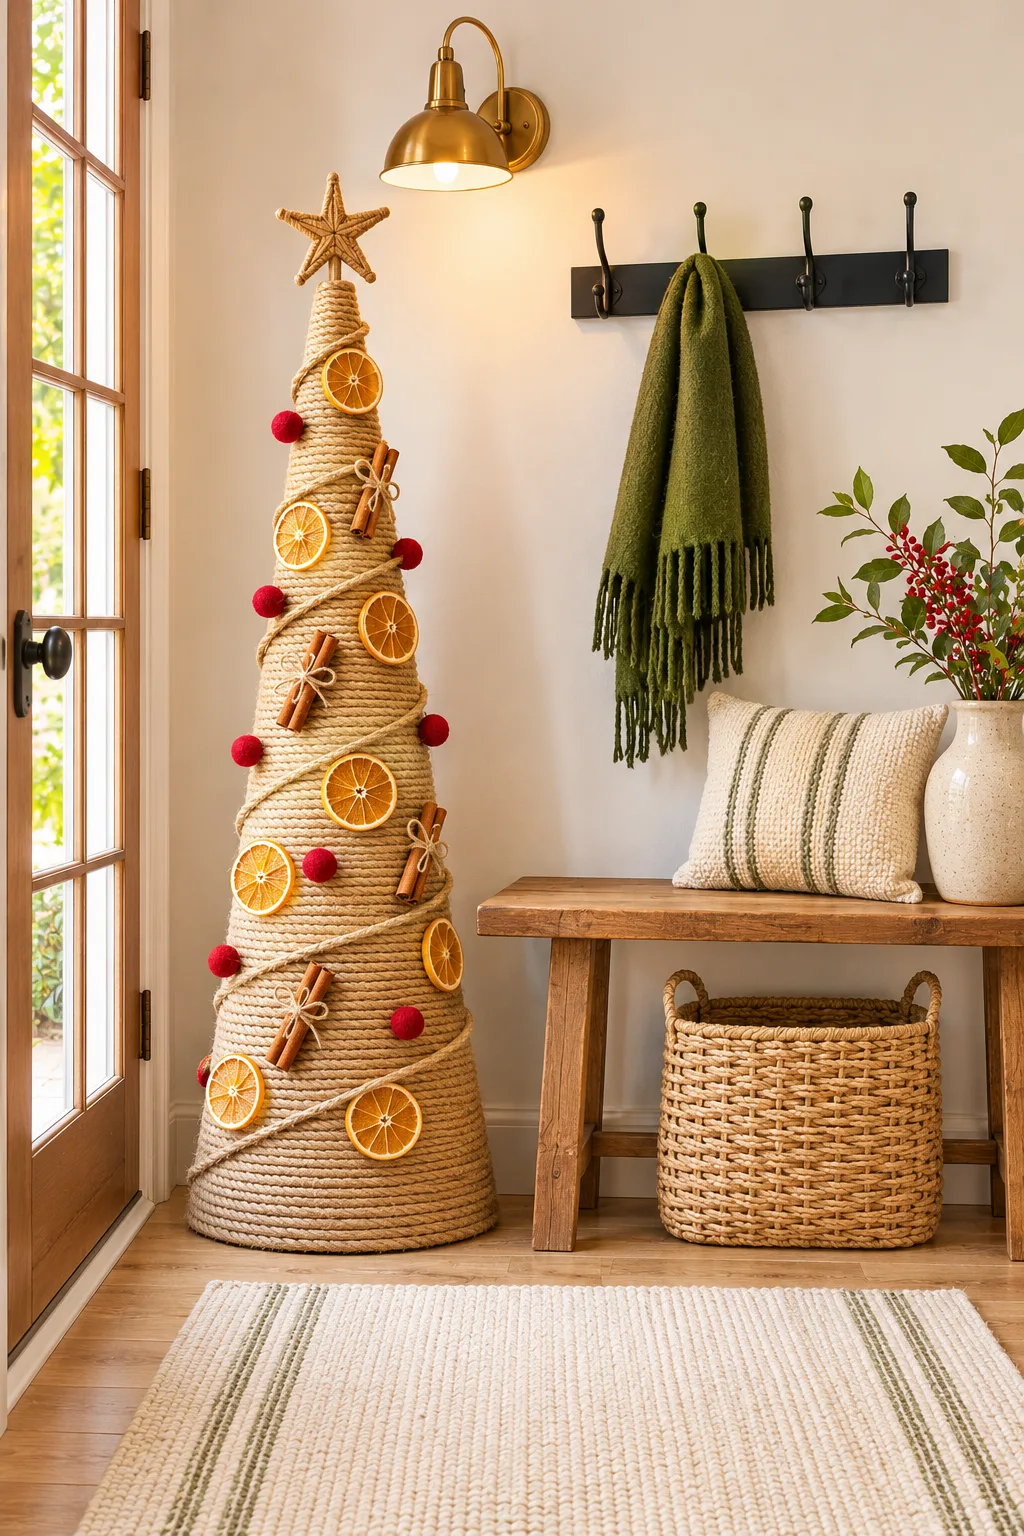
A slim, tan tree in the corner by the door tells guests the house is ready for them before they ring the bell.
What you’ll need
- A cone form (cardboard works) about 30 inches tall
- Jute twine and hot glue
- Dried orange slices, cinnamon sticks and red pom-poms
- A small star made from natural material
How to make it
- Glue the twine end at the base and wrap upward in tight rows, with no gaps showing.
- Loop a second length of twine into a garland and spiral it around the cone.
- Glue on orange slices, spacing them roughly 5 inches apart.
- Tie small cinnamon bundles with twine and tuck in the red pom-poms between them.
- Top with the star.
This is one of the cheap diy christmas tree ideas on a budget I’d start with, since twine and a cardboard form cost a few dollars. Jute sheds fibers, so vacuum the floor under it weekly. A 24-inch version fits the narrowest corner.
🤔 Did You Know? Orange slices dry well in an oven set to 200°F for about 3 hours, and they keep a faint citrus scent all season.
12. Make a cheerful pom-pom yarn tree for a pastel bedroom
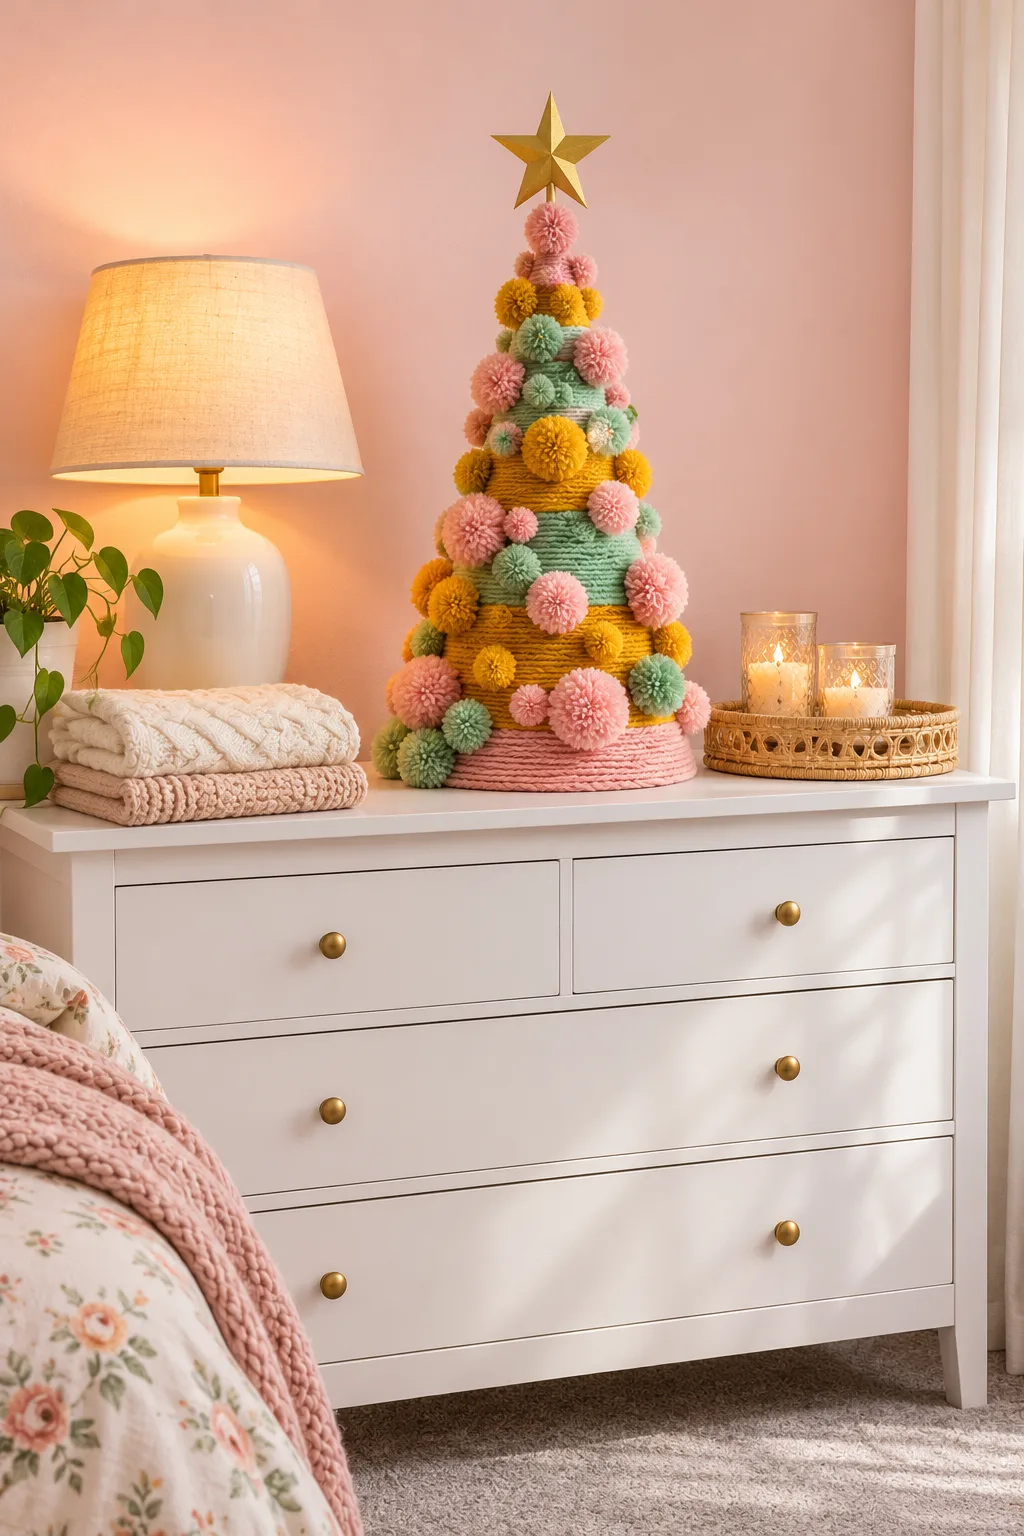
If your bedroom runs soft and sweet, this bright yarn cone adds Christmas color without a single traditional red or green.
What you’ll need
- A cone form and pink yarn for the base
- Mint and mustard yarn for the bands
- Yarn pom-poms in 3 sizes
- A gold star and craft glue
How to make it
- Wrap the whole cone in pink yarn and glue the end.
- Add bands of mint and mustard, each about 2 inches wide.
- Wind pom-poms around a fork or cardboard strip, tie, and trim.
- Glue them on in varied sizes, big ones low.
- Add the star.
Set it on the white dresser next to the linen-shade lamp, so the lamp glow warms the yarn. Use scraps from old knitting projects to keep costs near zero. Acrylic yarn holds its color and shrugs off dust better than wool, which tends to pill. Keep the rattan tray of candles at arm’s length, or switch to LED ones.
13. Cut a Scandinavian plywood tree for the dining nook
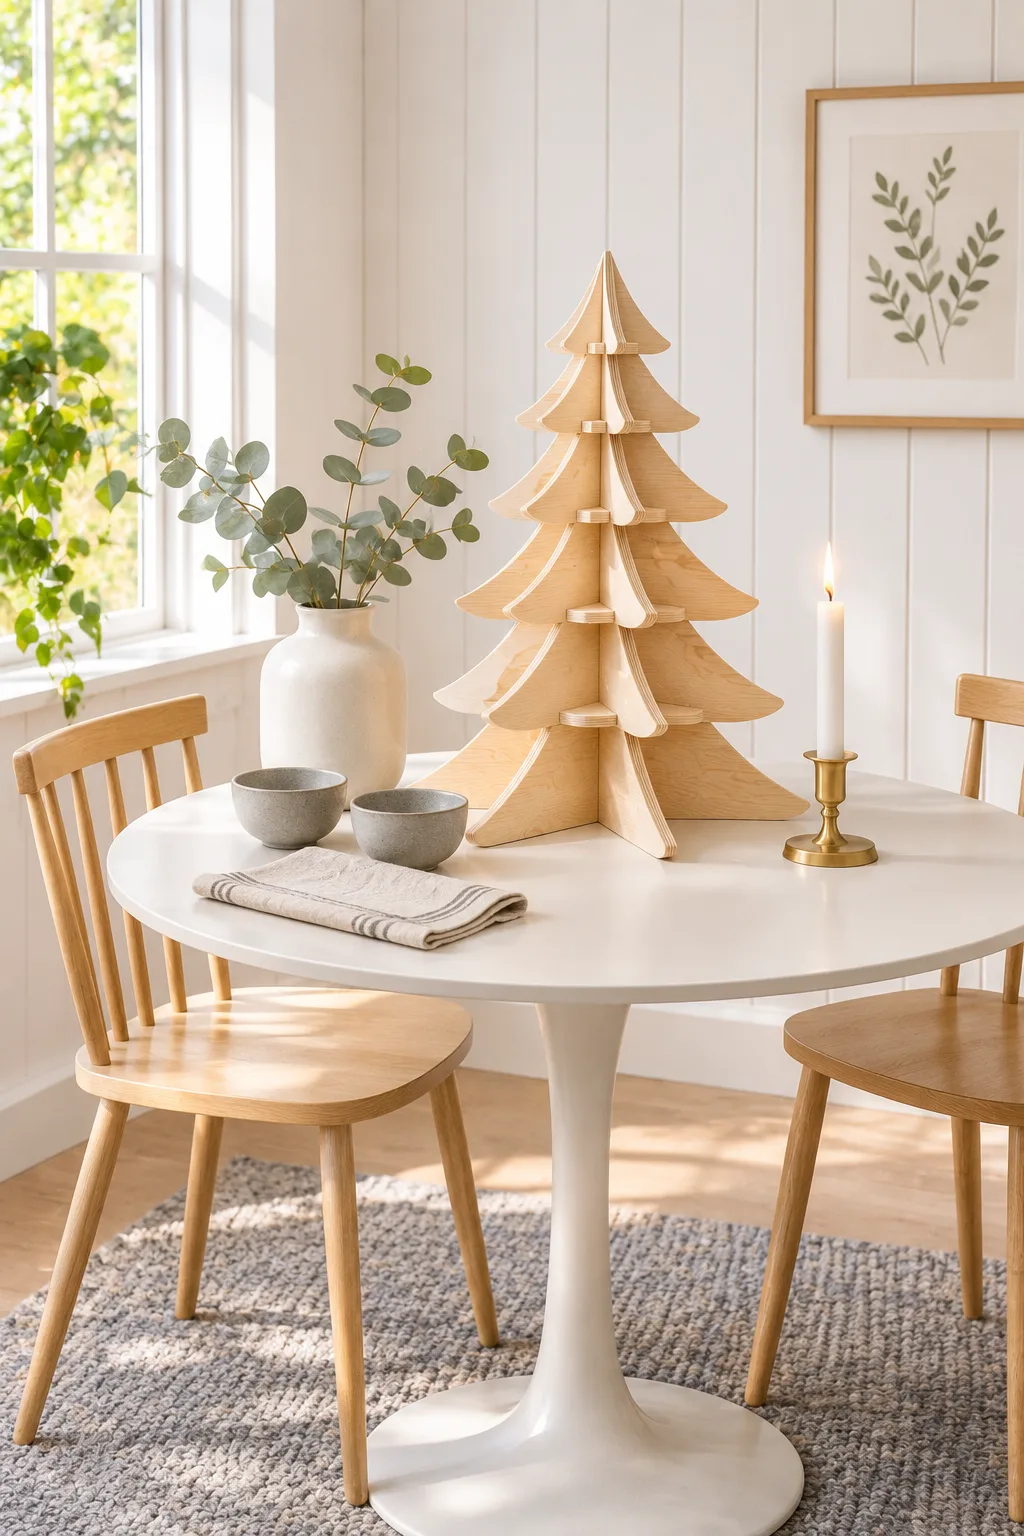
This pale wood tree is pure Nordic calm: tall, quiet and strong enough to be the only decoration on a round white table.
What you’ll need
- One sheet of 1/4-inch birch-toned plywood
- A jigsaw or a hardware store cutting service
- Fine sandpaper and a pencil
- A tape measure
How to make it
- Draw a 24-inch spine and 3 curved tiers, 16, 12 and 8 inches wide.
- Mark slots exactly 1/4 inch wide, so the pieces fit snugly.
- Cut everything out and sand each edge until it’s smooth.
- Slide the tiers onto the spine, widest at the bottom.
A diy christmas tree this size stays steady on a 30-inch table, and it won’t shed anything on the kids. Wipe it with a dry cloth and skip oils, which darken light wood unevenly. Test the slots with scrap wood first, since a few extra sanding strokes can fix a tight fit.
14. Build a moody evergreen tree on a wire frame
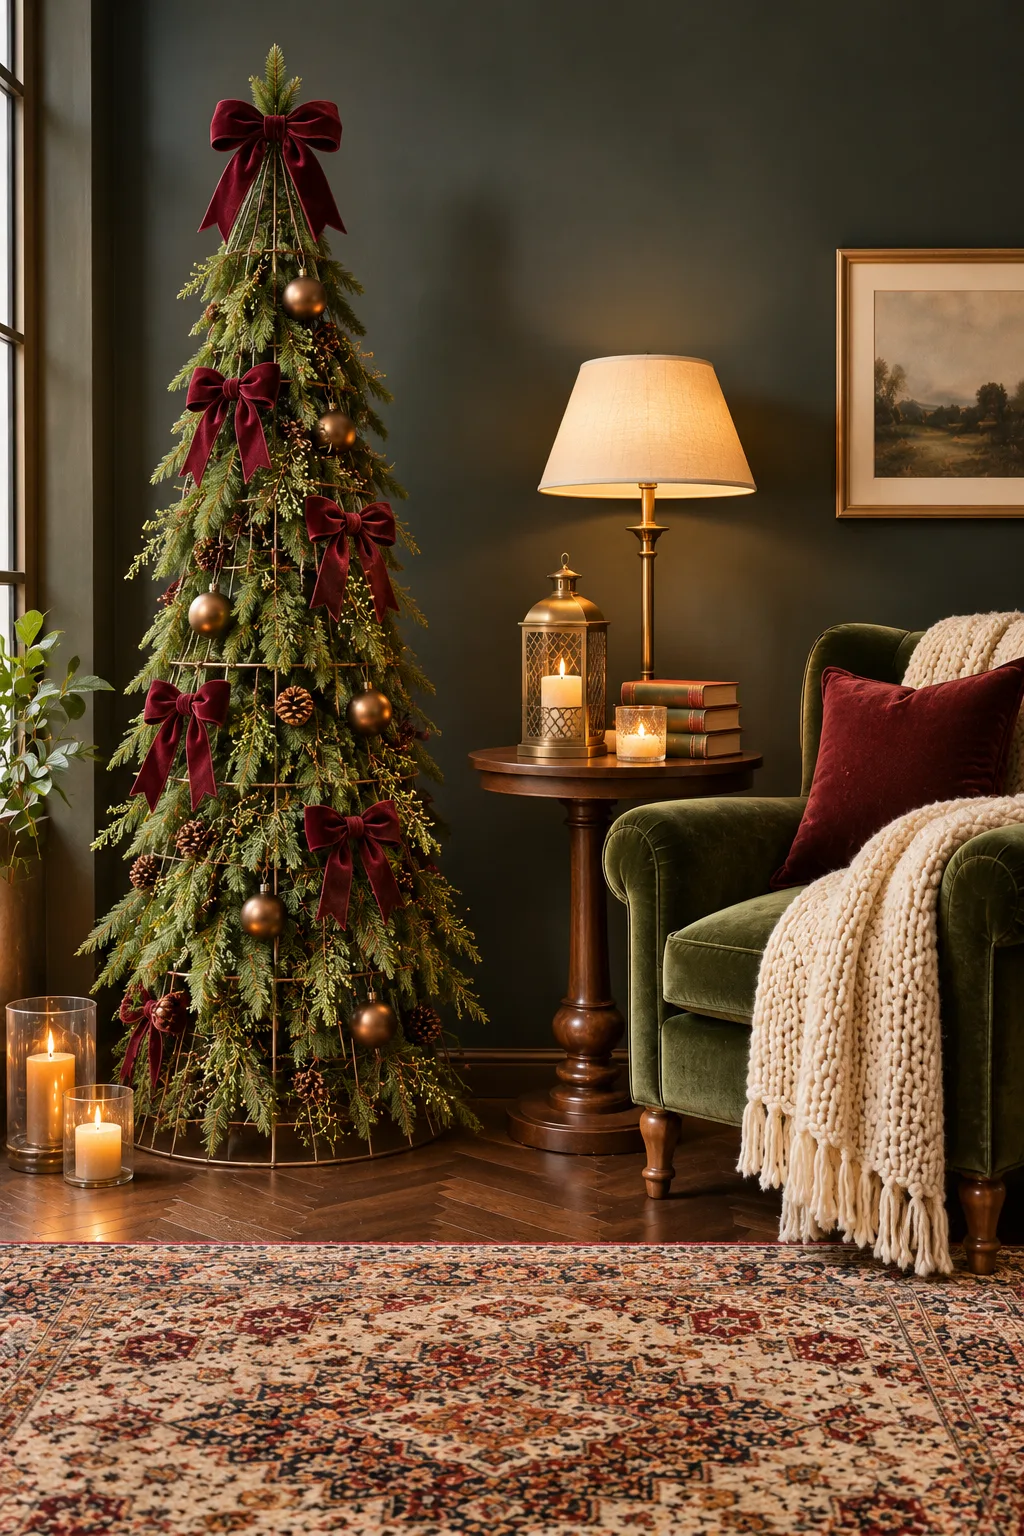
Against a dark green wall, a full evergreen cone with burgundy bows looks like it belongs in an old Christmas painting.
What you’ll need
- A wire cone frame about 4 feet tall
- Evergreen sprigs (fresh or faux)
- Burgundy velvet ribbon
- Bronze ornaments, pinecones and floral wire
How to make it
- Wire sprigs to the frame from the bottom up, overlapping like shingles.
- Tie velvet bows every 12 inches down the front.
- Tuck in bronze ornaments and pinecones.
- Finish with one large bow on top.
Tuck it in a corner by the window and pair it with a brass lantern on the nearby side table, so the metals repeat. A faux garland cut apart gives you the greenery for much less than buying a full tree. Fresh sprigs drop needles, so mist them lightly and lay a cloth underneath.
⚠️ Avoid This: Don’t tuck candles against the greenery. Keep any flame at least 12 inches from the sprigs and ribbon.
15. Stack a red gingham ruffle tree on the kitchen island
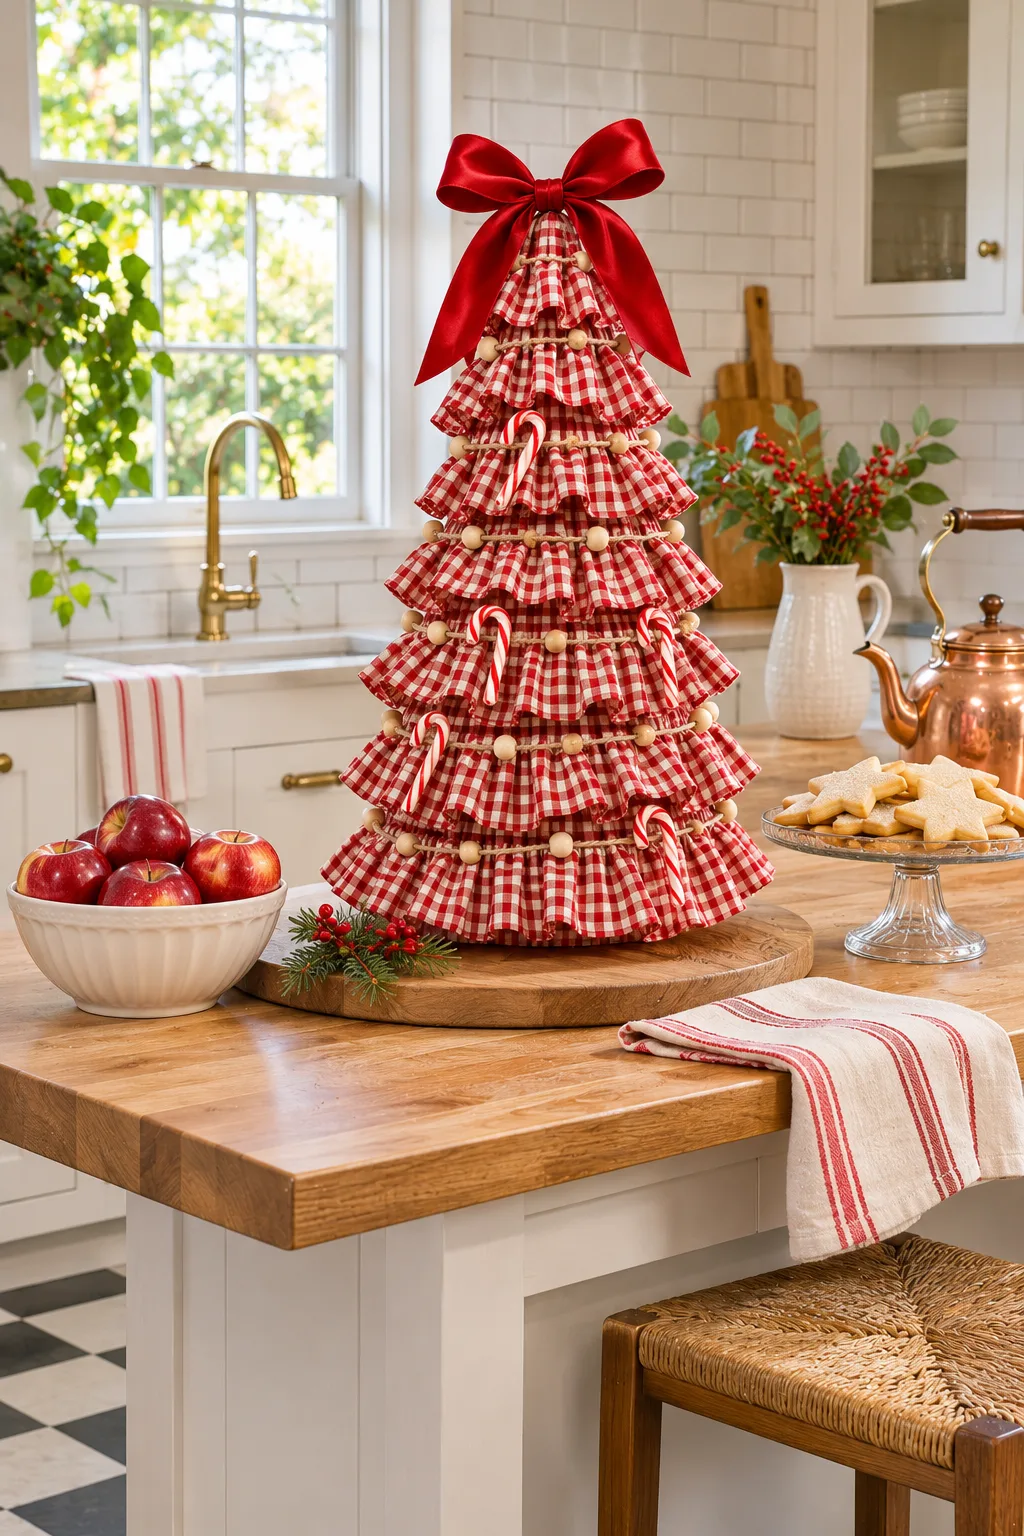
Red and white check is pure nostalgia, and a ruffled tree in that pattern looks right at home next to a bowl of apples.
What you’ll need
- A cone form about 18 inches tall
- Red and white gingham fabric strips
- Wooden beads on twine and mini candy canes
- Red satin ribbon and a round wooden board
How to make it
- Gather each fabric strip with a loose running stitch.
- Glue the ruffles in layers from the bottom up, like stacked skirts.
- Drape a bead garland across each tier.
- Tuck candy canes between layers.
- Top with a big satin bow.
If you’ve wondered how to make a diy christmas tree at home with little more than scraps, this is a solid answer. Gather red gingham ribbon into ruffles and stand it on the round board so it reads as one tidy display.
Use glue dots for the candy canes, because they get sticky near warm kitchen steam. Keep the tree off the edge if small hands or pets roam.

Final thoughts
Every tree here starts with a simple shape and a few honest materials. Twine, plywood, yarn, fabric and branches all turn into something people stop to admire. Pick the one that matches your space and your skill level.
A diy christmas tree doesn’t need a big budget or a free weekend. Start with one afternoon and one idea, then save your favorite look to Pinterest so you can find it again next December.
Frequently asked questions
How long does a handmade tree take to finish?
Most of these take 1 to 3 hours of hands-on work. Painted versions need extra drying time, so plan for an overnight wait.
What is the cheapest material for a homemade tree?
Cardboard, twine and fabric scraps cost the least. You can often find them around the house already.
How do I keep a paper or yarn tree safe near candles?
Keep real flames at least 8 to 12 inches away, or swap in LED candles. Yarn, paper and dry greenery all catch fire quickly.
Can I store these trees for next year?
Yes. Wrap them in tissue and keep them in a box on a closet shelf. Fabric and yarn trees stay fluffy if nothing gets stacked on top.
What size tree works best on a table or counter?
Aim for 18 to 30 inches tall. That height reads clearly without crowding a table or blocking a window.